Spis treści
Process execution in a BPM system
Activiti BPM Platform
Additional materials for the lab:
This instruction is for labs 30.11.2020 and 07.12.2020. During these labs, we will use Activiti 5.22. You can install it from https://www.activiti.org/get-started or use the online version on the temporary server: http://134.209.241.80:8080/activiti-explorer/.
But please remember to save your working models in files between classes, as the temporary server will not store the data between the classes. Do not change the password for the admin account, otherwise, the restart of the server will be needed and you will lose your models.
Log in to an admin account:
login: kermit
password: kermit
After logging in, the top bar should contain a menu of 4 icons for managing:
- Tasks – tasks,
- Processes – processes,
- Reports – reports,
- Manage – other resources, e.g. users, groups, database management or process implementation.
Using the Groups tab (Manage menu), check the existing user groups. As an administrator user, create your own admin account. Remember to assign a unique identifier (e.g. with the initials of the people of your group), so we would not have to use the same kermit user. You will also need some users who are not administrators, so create new regular user accounts for each person in your group (remember about unique ids).
A new process model
In order to get acquainted with the application, as an administrator, you will prepare a very simplified model of gathering offers.
Select the Processes tab from the menu. You should see 3 tabs:
- My instances – to observe the existing instances of the process,
- Deployed process definitions – to execute processes implemented on the Activiti platform,
- Model workspace – to create new models and to implement or edit existing process models.
In the opened Alfresco Activiti Modeler application window, set the process attributes. The essential elements are the process identifier (Process identifier) and the process name (Name), which will allow you to distinguish your process from other processes or other users' processes. Complete also the process author field (Process author).
Simple process modelling
By dragging a Start event element from the left menu, you will start modeling the fragment of the target process.
First, model a very simplified process as presented below:

As in the case of the process, for the BPMN elements, you can set the selected attributes:
- for Start event:
- Documentation: Start proceeding with an offer.
- Initiator: initiator (the user who initiated the process will be stored in this variable)
- Name: Offer received
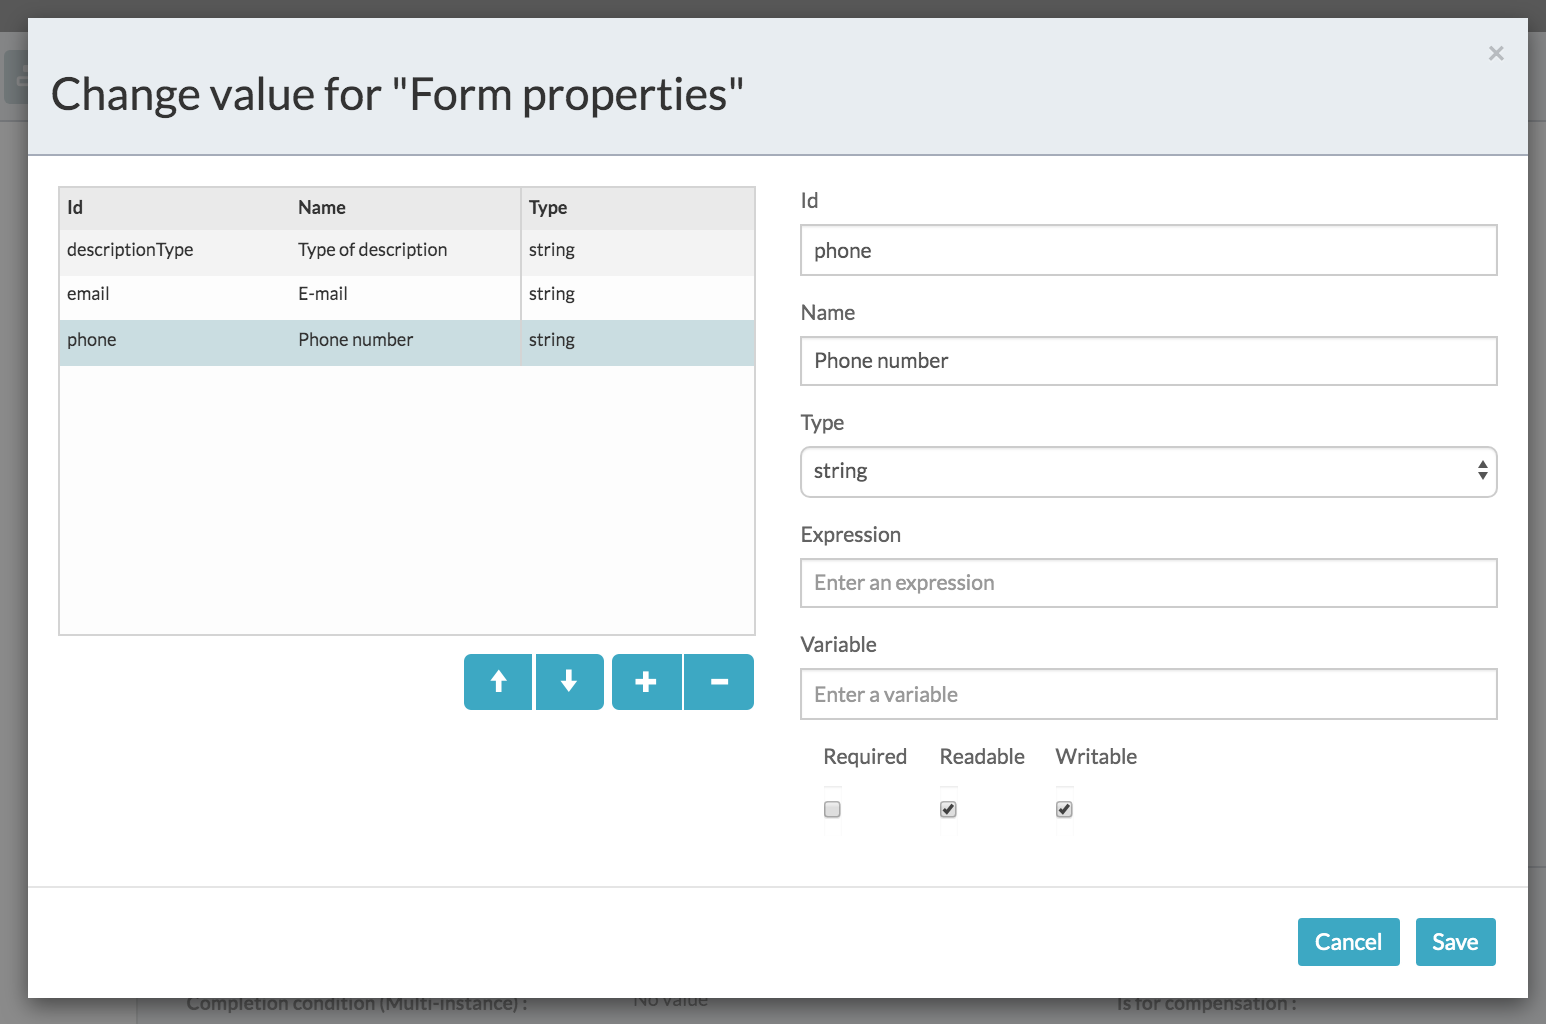
- Form properties – click on … and in the new window set the properties according to the following screenshot:
- for Specify offer task:
- Documentation: Please add available specification for an offer as attachments.
- Assignments: there are three possibilities
assignee– assign a task to a specific user,candidateUsers– assign a task so that any of several users can perform it,candidateGroups– assign a task so that any user belonging to the assigned group can perform it.
In our case, set only the variable assignee to ${initiator} – this means that as a task executor, we indicate the person who started the process.
In addition, for this task, we also set Form properties:
- Specifications details (id:
specDetails) – level of detail of the specification of the contract offer (for now we set it as aboolean), in the next part, we will transform this variable into an enum type (accurate, sufficient, insufficient). - Person responsible (id:
responsible) – a person assigned to the formal analysis of the application (responsible for carrying out the analysis); such a person will be assigned to a variable.
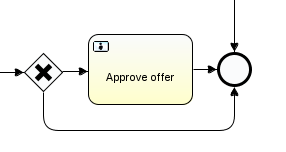
For now, to test such a simple process, we skip other elements of the process. Meanwhile, let's mock one of the final tasks: Approve offer, in which set only the executor – the person who was assigned to perform the formal analysis (please use the identifier of the defined variable).
Executing a simple process model
Save a model and exit Alfresco Activiti Modeler. Go back to Activiti Explorer. In Model workspace, select your process from the menu and from the Model action list, choose Deploy.
You should be moved to Deployments (in Manage), where you can choose your process (click on its underlined name) in Process Definitions. After deploying the model, from the tab Deployed process definitions, you can start your process with the button Start process. You should see the following form:
 Fill in the form with any data and click Start process.
If you succeed, in the Processes → My instances, you should see an instance of your process.
Since the first task is assigned to us (the user who started the process), click the Tasks icon and go to the Inbox/ tab, where the task Specify offer should be waiting for us. Fill the Responsible field with the name of another existing user (e.g. your previously defined user). You can also tick a checkbox Specifications details. Then, click Complete task.
Click Processes icon and go to My instances to view the diagram, task list, and process variables. Because the task Approve offer is waiting for your another user, log in to the account of your user and finish the task Approve offer. Return to the admin account and check if the process has disappeared in the My instances tab.
Historic data of the process are saved in the database, which is available in the Database tab (in the Manage tab). Find the table ACT_HI_PROCINST and find your process there.
Because for this laboratory, Activiti installation with Alfresco Activiti Modeler does not save models permanently, save your model on the hard disk. To do this from the menu Deployments select Show all and search for your process. Save your process file (file with extension .bpmn20.xml) and view its syntax. Note some process tag attributes, as well as the additional attributes of other process elements used by Activiti.
Extending model
Return to the Model workspace tab to extend your model with a gateway. Depending on the level of detail of the offer specification, if it is not sufficiently detailed, we would like to ask the requester to send us additional information. To extend your model, select the appropriate model and click Edit model.
Extend your model to the form as shown in the diagram below:

An important element of the model is the use of appropriate conditions in the flows from the XOR (exclusive) gateway (depending on the variable value specDetails).
Check in Activiti User Guide, how to define the appropriate conditions for this gateway.
Further model extensions
Timer Boundary Event
Your subprocess consists of two tasks, contacting the customer by e-mail and phone (call to inform about the e-mail sent to the customer). In a very detailed version, we should additionally have an appropriate task waiting for a response from the customer – but for simplicity let's assume that when the customer has provided detailed information by phone, the user ends the task „Call customer”, otherwise they do not finish this task until they receive sufficient information.
In the standard case, when the deadline for submitting offers has passed, the subprocess should automatically end and finish the whole process. For this purpose, expand the process using the Timer Boundary Event:
Timer Boundary Event has the following attributes:
cancelActiviti– in our case, settrue' to interrupt the subprocess at the moment when the event is triggered,timeDate– sets a specific date (in the format ISO 8601]), when to trigger an event, e.g.:
<timerEventDefinition>
    <timeDate>2012-12-06T17:00:00</timeDate>
</timerEventDefinition>
timeDuration– sets the period of time that must elapse before an event is triggered, e.g. for 3 days:
<timerEventDefinition>
    <timeDuration>P3D</timeDuration>
</timerEventDefinition>
timeCycle– sets time intervals to trigger an event periodically (repeat it), e.g. 5 repetitions, each for an hour:
<timerEventDefinition>
    <timeCycle>R5/PT1H</timeCycle>
</timerEventDefinition>
In order to be able to test the process and not wait too long for the effects, just set the timeDuration to 2 minutes.
Test your model, check the diagram of the process instance while waiting (it should look similar to the model shown in the diagram below):

At this point, a new „Timer job” should appear in the tab Manage → Jobs.
If necessary, the event can be triggered manually by pressing the Execute button:

Mail task
One of the tasks in the subprocess should send an e-mail to the client.
In the full process, it would be necessary to download additional data to send an e-mail beforehand.
e.g., what kind of details we'd like to know about.
If you use your Activiti installation, you can mock the operation of this task.
If you do not have a configured mail server, you can address the mail to a local address, e.g: „student@AML-Lab-316.geist.agh.edu.pl”.
After sending the e-mail, you can check the e-mail in the terminal with the „mail” command, if you received the message to the mailbox.
Please include in the body of the e-mail data held in a variable of the process instance.
Script task
Some of the extensions below may require to use an Activiti Designer extension to an Eclipse platform.
Extend the model to the form as shown in the diagram below:
For the given properties prepare a form in Set formal conditions task (boolean type):
formalCertificates– The company has the required certificatesformalExperience– The company has sufficient experienceformalConflicts– Offer causes conflict with other orders
Depending on your needs, you can set the default values in the appropriate fields using the default attribute.
In the Check formal conditions task, select the language groovy, then set the appropriate value (negative or positive) of the resOffer variable. To define a variable in the groove and then export it to your process, use the following syntax:
def resOffer = "negative"
/* TODO: check the conditions and if necessary,
convert resOffer to positive
*/
execution.setVariable("result", resOffer)
The variable can also be displayed within some UserTask by adding a tag in XML:
<documentation>Formal condition check result is: ${result}</documentation>
The elements of the Groovy (programming language) are supported according to its syntax. For checking the syntax, you can try online console.
Completion of the process with a negative result
If the result of the formal fulfillment of the conditions is negative, the process should end. Add a gateway that will control the flow depending on the result, in order to finish the process accordingly.
Multi instance task
Approval of the offer by the members of the Management Board
In order to complete the process, we will model the approval of the offer by the members of the Management Board.
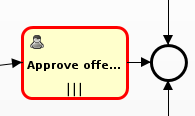
 For this purpose, the „Approve offer” task should be defined as multi-instance task.
The following parameters are available in the Multi instance tab in the Activiti eclipse environment:
- Sequential – sequential (
true) or parallel (false) execution, - Loop cardinality – number of instances (checked only once, when creating a task),
- Collection – collection variable (a list of users who are to perform the task),
- Element variable – a variable that stores individual users in order to assign them to a task,
- Completion condition – the condition for completing the task.
In Activiti User Guide, check how to define the appropriate condition for completing a task. Let's assume that the Company considers a board decision to have been made if it was made by at least two of the three board members. Since we have not yet defined the board variable, please add the board variable, which is a list of board members (consisting of existing Activiti users).
Then, start the process and test it for different scenarios.


